In this post we will walk through an automated Internet Information Services (IIS) deployment using Deployment Groups in Azure DevOps. We will install the Azure Pipeline agent on a virtual machine and register it with a Deployment Group. From there we will automate the deployment of an IIS website using Azure Classic pipelines. Our pipeline will also include Central Certificate Store (CCS) configuration and certificate binding on the website.
In a subsequent post I will show you how to do the exact same thing using Environments and YAML pipelines.
This pipeline was developed for a single instance of IIS. However, it should work with an IIS cluster with shared configuration and content assuming you target a single instance from the cluster.
What Are Deployment Groups?
Deployment Groups gives flexibility by allowing logical grouping of servers to execute actions against in your Azure pipelines.
Deployment Groups allow for easy integration with Cloud or On-Premises servers. Since the Azure Pipelines agent works as a polling agent, there is very little required from a firewall perspective, as long as your server has outbound connectivity to the internet there should be nothing standing in the way of installing and configuring the Azure Pipelines agent.
Once the Azure Pipelines agent is installed, you are able to perform tasks against those servers. You can also assign more granular tags to the servers, which allows for further filtering within your job execution.
Create A Deployment Group
- Log into Azure DevOps.
- Choose your Organization and Project.
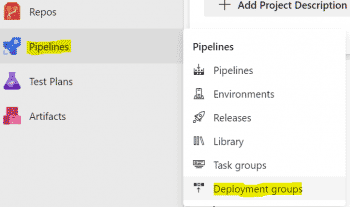
- Go to Pipeline > Deployment Groups.
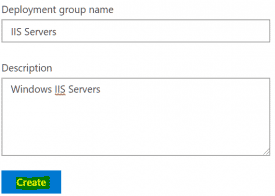
- On the top panel click +New.

- Give the group a name and description, click Create.
On-board Server to Deployment Group
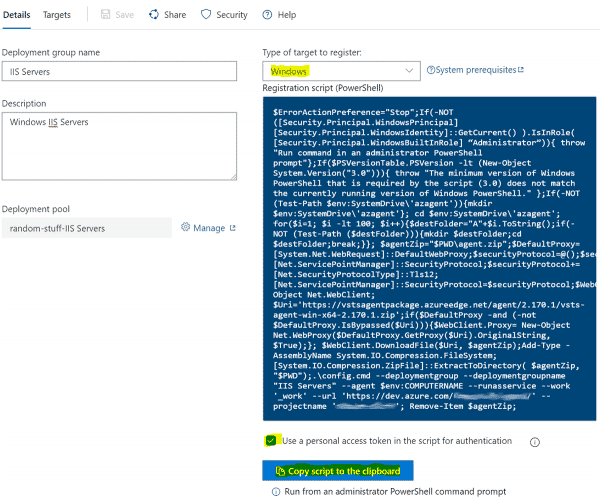
- Ensure Windows is selected as the Type of target to register - it should be, by default.
- Make sure to check off Use a personal access token in the script for authentication. This creates a token within your account that can read and manage Deployment Groups, it is valid for the day. This token is only used to activate the agent, it is not at all after the agent is installed.
- Click Copy script to the clipboard.
- Now log into the server you identified for this Deployment Group.
- Right click on the Start Menu, go to Command Prompt (Admin) or Windows PowerShell (Admin). If using Command Prompt, type powershell and press Enter.
- Paste the script in the PowerShell window and press Enter.
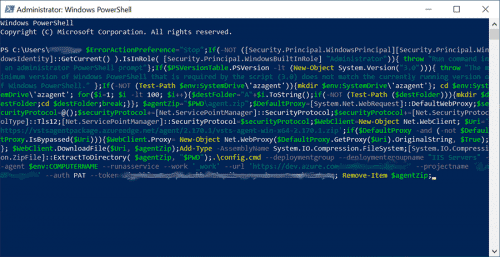
- Accept the defaults. By default the Azure Pipelines agent service runs under the NT AUTHORITY\SYSTEM account.
You can install using a service account. You will need to grant the service account with the required permissions to perform pipeline actions.
Validate Install
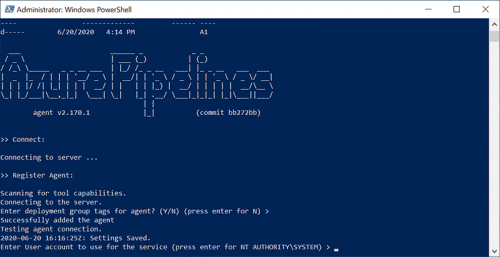
- Confirm there are no errors in the output of the script. Here is a common error I’ve seen - it can be disregarded.
[2020-06-20 16:17:23Z ERR  NativeWindowsServiceHelper] Can't enumerate account rights, return code 3221225524.
[2020-06-20 16:17:23Z INFO NativeWindowsServiceHelper] Successfully grant logon as service privilage to account 'SYSTEM'
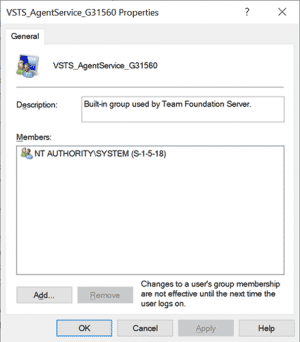
- Check that a new local group (VSTS_AgentService_xxxxxx) was created.
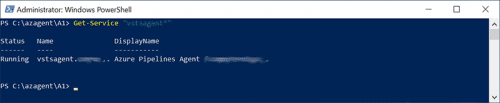
- Check that the service is running as described.
Get-Service "vstsagent*"
- Check the Azure DevOps deployment group to see target is listed as online.

Prepare Pipeline
Create Azure Key Vault
- From Azure Portal, create a new Key Vault or use an existing Key Vault.
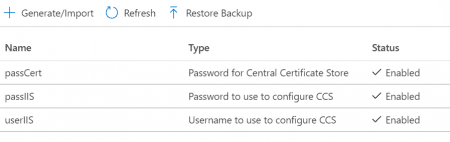
- Create some secrets.
| Variable Name | Value |
|---|---|
| userIIS | Username to use to configure Central Certificate Store (CCS) |
| passIIS | Password to use to configure CCS |
| passCert | Password used for certificates in CCS |
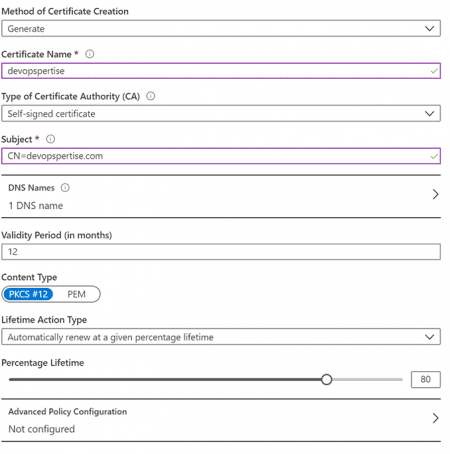
- Generate or import a certificate for your website, in this example I am using a self signed certificate SAN certificate generated and stored in a Key Vault. You can forgo this process and put your certificate directly on the server if you choose to do so.
Create Service Principal and Service Connection
- Create a new Service Principal.
- Grant the Service Principal with Reader access at the Resource Group level that contains the Key Vault.
- Grant the Service Principal read+list permissions for Secret and Certificate in the Key Vault.
- Create a new Service Connection using the Service Principal and secret.
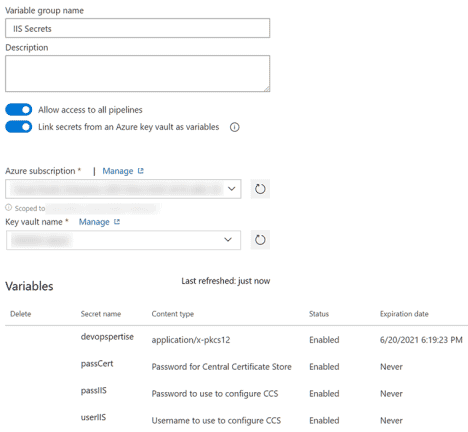
Create Variable Group
- From Azure DevOps, go to Pipelines > Library.
- Go to + Variable group.
- Create a Variable group like the screenshot below, use the service connection you configured in the previous step.
Create Pipeline
- From Azure DevOps, go to Pipelines > Releases.
- Go to + New > New release pipeline.
- Start with an empty job, name the stage Deploy Web App and Cert.
- Click on the Variables tab and to go Link variable group and select the Variable group you created.
- Set up some additional pipeline variables, alter them as required.
| Variable Name | Value |
|---|---|
| cert | Variable name from Variable Group |
| certStoreFolder | Directory to store CCS certificates |
| toggleCert | Feature toggle to deploy certificate ($true/$false) |
| toggleCertStore | Feature toggle to configure CCS ($true/$false) |
| websiteName | Website Url |

- Add your build artifact.
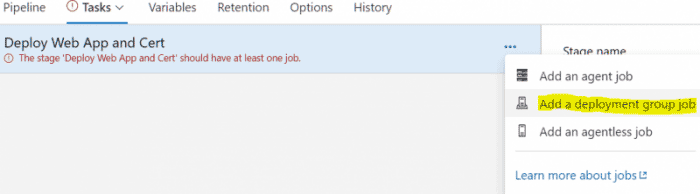
- Click on the stage Deploy Web App and Cert, and remove the Agent job.
- Add a Deployment group job, set the Deployment group to the IIS deployment group you created previously. You can also filter on tagging here if you have multiple servers and would like to target a specific one.
- Add a new PowerShell task.
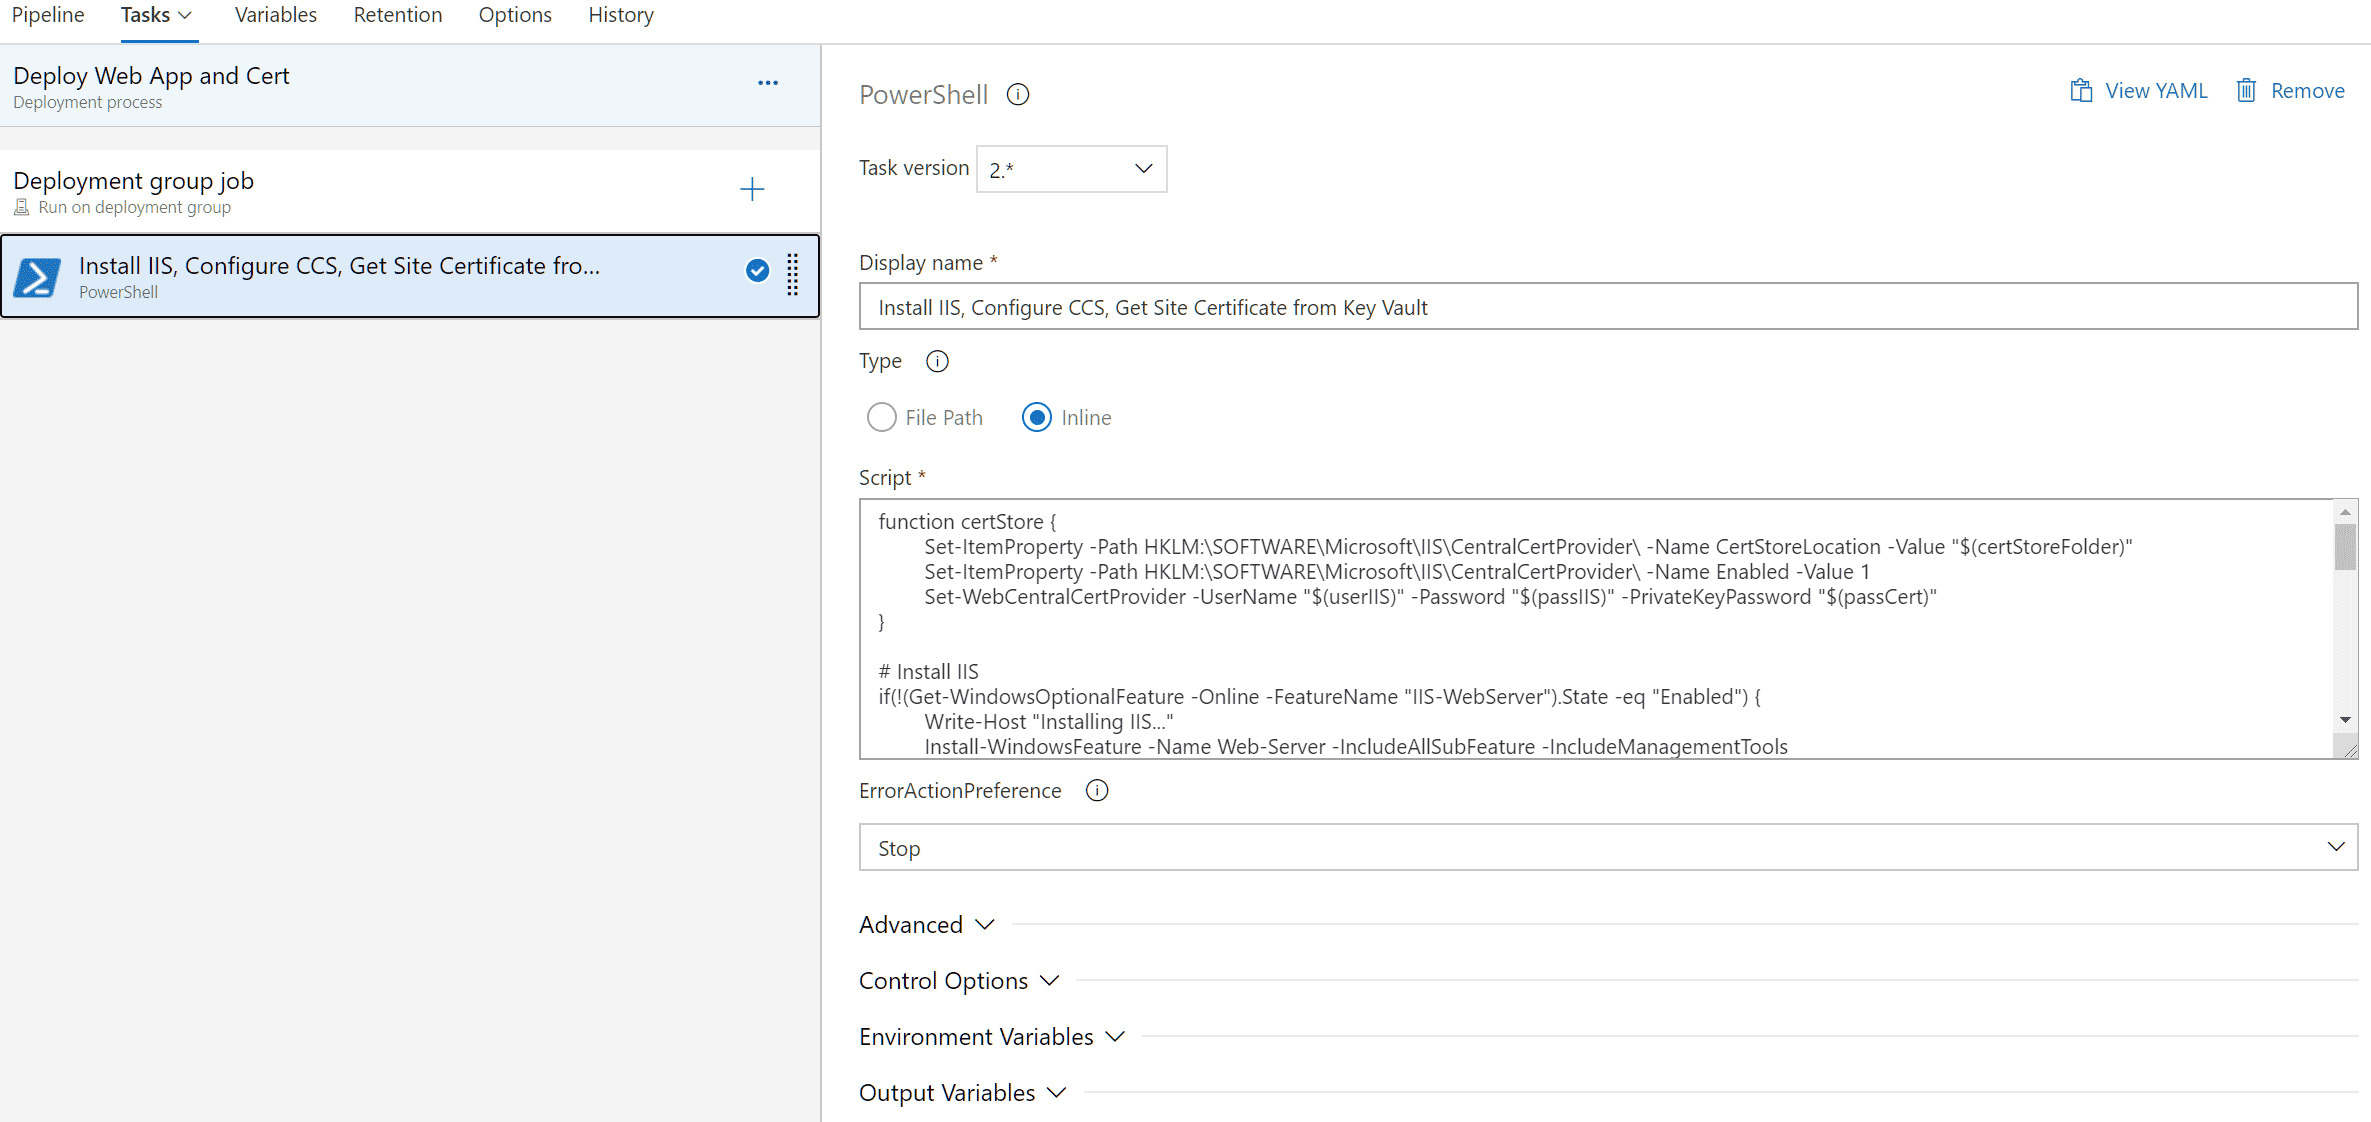
function certStore {
	Set-ItemProperty -Path HKLM:\SOFTWARE\Microsoft\IIS\CentralCertProvider\ -Name CertStoreLocation -Value "$(certStoreFolder)"
	Set-ItemProperty -Path HKLM:\SOFTWARE\Microsoft\IIS\CentralCertProvider\ -Name Enabled -Value 1
	Set-WebCentralCertProvider -UserName "$(userIIS)" -Password "$(passIIS)" -PrivateKeyPassword "$(passCert)"
}

# Install IIS
if(!(Get-WindowsOptionalFeature -Online -FeatureName "IIS-WebServer").State -eq "Enabled") {
	Write-Host "Installing IIS..."
	Install-WindowsFeature -Name Web-Server -IncludeAllSubFeature -IncludeManagementTools
}
else {
	Write-Host "IIS-Webserver is already enabled - skipping IIS installation."
}

# Configure Central Certificate Store
Write-Host "toggleCertStore: $(toggleCertStore)"
if($(toggleCertStore)) {
	if(!(Test-Path "$(certStoreFolder)")) {
		Write-Host "$(certStoreFolder) does not exist - configuring Central Certificate Store."
		New-Item -Path "$(certStoreFolder)" -ItemType "directory"
		certStore
	}
	else {
		Write-Host "$(certStoreFolder) exists - configuring Central Certificate Store."
		certStore
	}
}

# Get site certificate and password from key vault and copy it to Central Certificate Store folder.
Write-Host "toggleCert: $(toggleCert)"
if($(toggleCert)) {
	$kvSecretBytes = [System.Convert]::FromBase64String("$(cert)")
	$certCollection = New-Object System.Security.Cryptography.X509Certificates.X509Certificate2Collection
	$certCollection.Import($kvSecretBytes,$null,[System.Security.Cryptography.X509Certificates.X509KeyStorageFlags]::Exportable)

	$protectedCertificateBytes = $certCollection.Export([System.Security.Cryptography.X509Certificates.X509ContentType]::Pkcs12, "$(passCert)")
	$pfxPath = "$(certStoreFolder)" + "\" + "$(websiteName).pfx"
	Write-Host "Copying certificate to $pfxPath"
	[System.IO.File]::WriteAllBytes($pfxPath, $protectedCertificateBytes)
}
- Add a new IIS web app manage task. Make sure to enable Create or update app pool. We will create the binding the next step so avoid creating it here as this task does not support Central Certificate Store.

- Add a new PowerShell task.
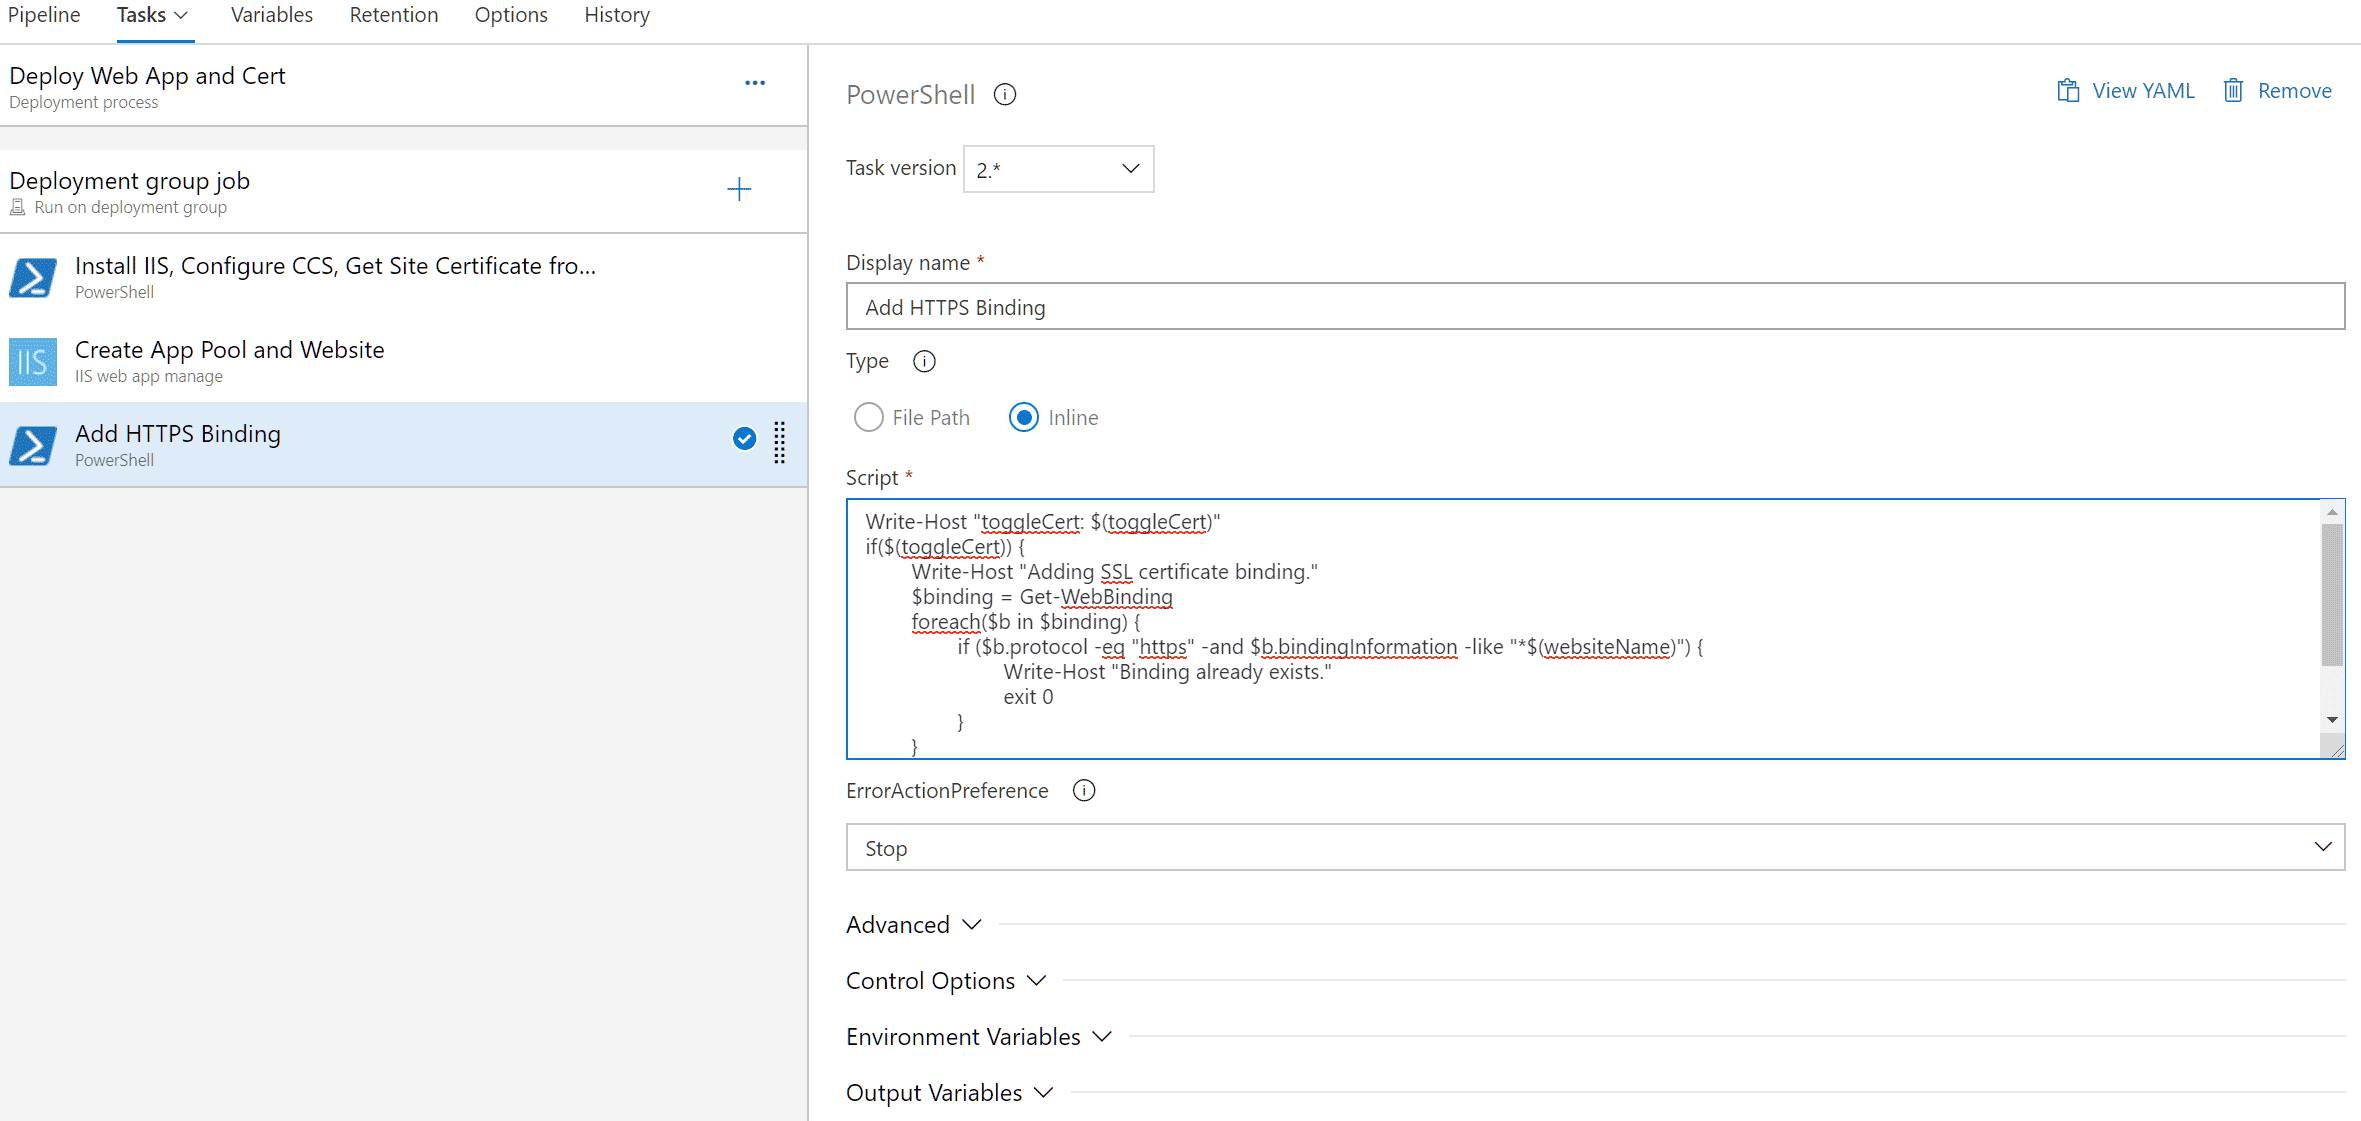
Write-Host "toggleCert: $(toggleCert)"
if($(toggleCert)) {
	Write-Host "Adding SSL certificate binding."
	$binding = Get-WebBinding
	foreach($b in $binding) {
		if ($b.protocol -eq "https" -and $b.bindingInformation -like "*$(websiteName)") {
			Write-Host "Binding already exists."
			exit 0
		}
	}
	New-WebBinding -Name "$(websiteName)" -sslFlags 3 -Protocol https -IP * -Port 443 -HostHeader ("$(websiteName)")
	New-Item -Path "IIS:\SslBindings\!443!$(websiteName)" -sslFlags 3
}
- Add a new IIS web app deploy task. Set the folder to the build artifact folder.

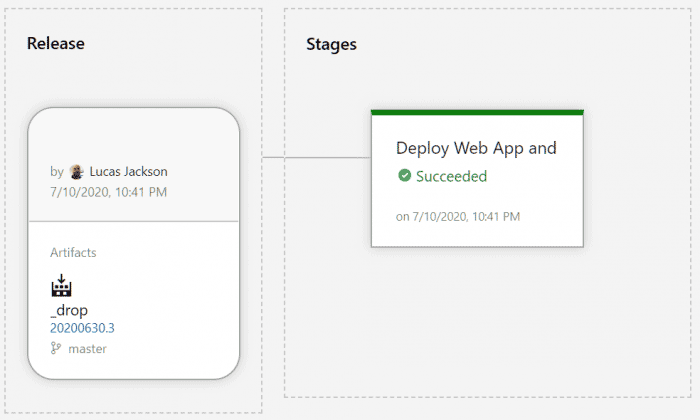
- Save and run your pipeline, good luck!
Validation
-
Log into a server to which you successfully deployed.
-
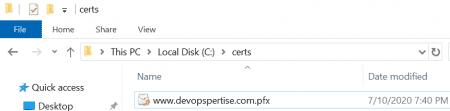
Verify the certificate is copied to the folder you specified.
- Launch IIS Management Console.
- Open Centralized Certificates, confirm configuration.


- Check that the website is created IIS Management Console.
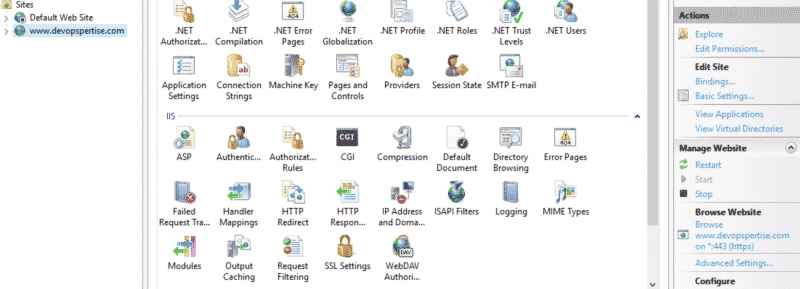
- Verify website is running.