Network Security Groups (NSG) provide a mechanism to harden your network traffic by using allow/deny rules.
They are essential building blocks to establishing a secure environment and should be used to lock down your work loads in the Azure environment.
Typically you would manage NSGs using source control in the form of an ARM template or a Terraform script. This allows for change control, version history, ease of manageability and automation.
However in some cases, NSGs may be maintained manually - due to various reasons. In such cases it could make sense to use some automated mechanism to export the NSGs on a regular basis for tracking/backup purposes.
If you have a specific use case for exporting NSGs on a regular basis you can use the following automation as a skeleton.
In a nutshell, we use an Azure DevOps YAML pipeline to automate the export of NSGs from an Azure subscription and dump them to a Storage account.
The following sections will help with setting it up, end-to-end.
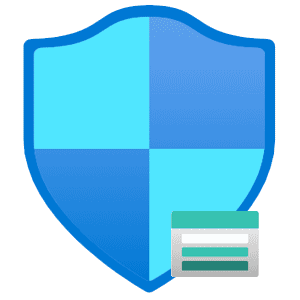
Create an App Registration
- Log into the Azure Portal and navigate to Azure Active Directory.
- On the left menu, click App registrations.
- Near the top, click New registration.
- Create a new App registration using the default values.
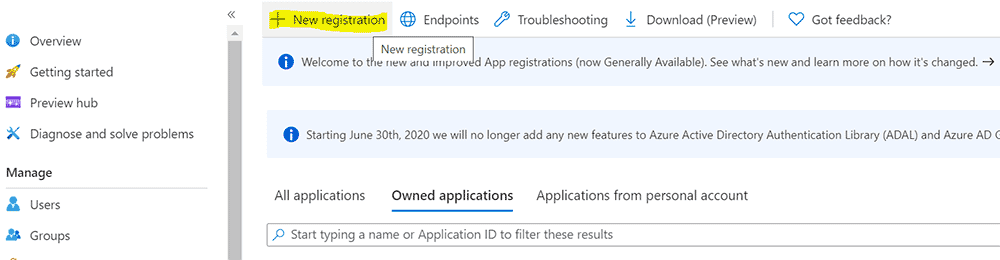
Create a Client Secret
- On the overview page for the App registration you create, click Certificates and secrets on the left menu.
- Near the bottom on the pane, click new Client secret.
- Copy the auto generated secret, this will be used in a subsequent step.
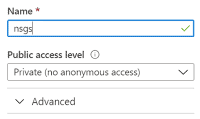
Create a Storage Account and Blob Container
- Create a General Purpose v2 Storage account, accepting the defaults.
- Go to the newly created resource.
- On the Overview page, click Containers in the main pane.
- Click + Container.
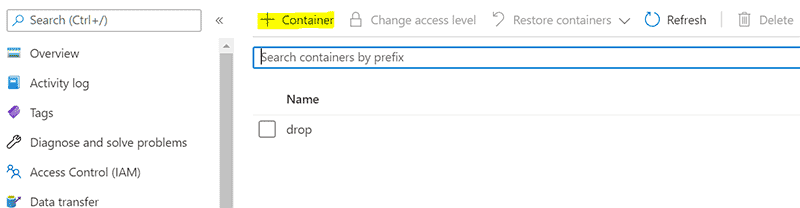
- Create a new Container called NSGs
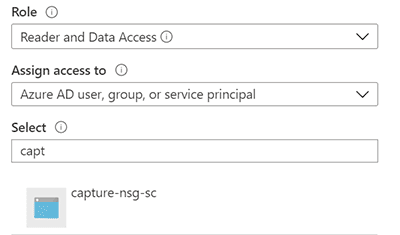
Grant Permissions to Storage Account
- From the overview page for the Storage account you created in the previous step, go to Access Control (IAM) on the left menu.
- Click Add+ > Add role assignment.
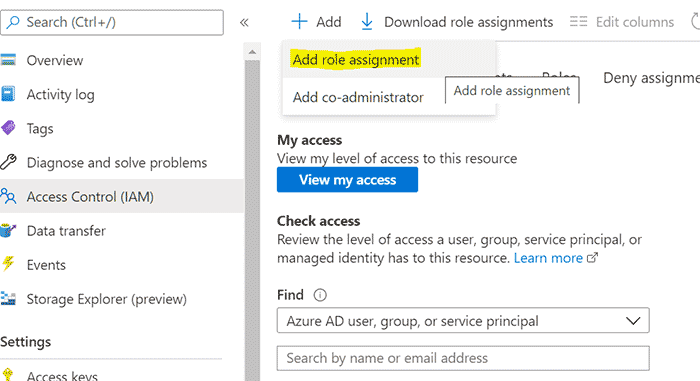
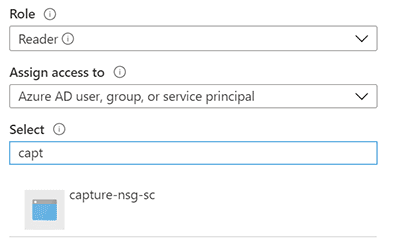
- Grant the App registration, Reader and Data Access role on the Storage account.
Grant Permissions to Read NSGs
- Go to Subscriptions, and select the Subscription we will be implementing the automation on.
- On the overview page for the Subscription, go to Access Control (IAM) on the left menu.
- Click Add+ > Add role assignment.
- Grant the App registration, Reader role at the Subscription level. (If you store NSGs in a specific resource group, you can target the resource group instead)
Create a Service Connection
- Go to Azure DevOps.
- Select your project.
- Click Project settings in the bottom left corner.
- Select Service connections from the left menu bar.
- Set up a new Service connection using the details from your App registration.
Source the PowerShell Script
Source the following PowerShell script, it is required for the Azure DevOps YAML pipeline. You can source this script from my GitHub repository as well.
<#
    .SYNOPSIS
      Gets all Network Security Groups (NSG) security rules and dumps them to JSON format.
    .PARAMETER Subscription
      The name of the subscription that you want to target.
    .DESCRIPTION
      This script creates JSON files (ARM templates) for each NSG detected in the subscription specified.

      Script will create a file for each NSG, same as "Export to Template" in the Azure Portal.

      Designed for Azure DevOps pipeline usage.
    .NOTES
      Version: 1.0
      Author:  Lucas Jackson
      Date:    09/25/2020
    .EXAMPLE
      .\Get-AzNetworkSecurityGroupSecurityRules.ps1 -Subscription "Subscription01"
    .LINK
      https://www.devopspertise.com
#>

param(
      [Parameter(Mandatory = $true)]
      [ValidateNotNullorEmpty()]
      [String]$Subscription,

      [Parameter(Mandatory = $false)]
      [ValidateNotNullorEmpty()]
      [String]$Path = $env:SYSTEM_DEFAULTWORKINGDIRECTORY
)

$ErrorActionPreference = "Stop"

Try {

  $Path = "$Path\nsgRules\$Subscription"

  Write-Host "Targeting Subscription -> $Subscription`n"
  Set-AzContext -Subscription $Subscription

  Write-Host "Retrieving current status of Network Security Groups from $Subscription..."
  $nsgs = Get-AzNetworkSecurityGroup
  Write-Host "Found" $nsgs.Count "NSGs...`n"

  Write-Host "Creating output directory at $Path"
  mkdir "$Path" -Force | Out-Null

  foreach ($nsg in $nsgs)
  {
    $name = $nsg.Name
    Write-Host "Exporting NSG rules for $name"

    Export-AzResourceGroup -ResourceGroupName $nsg.ResourceGroupName -Resource $nsg.Id -Path "$Path\$name.json" -Force
  }

  Write-Host "Ready for upload to blob storage from $Path"

  exit 0
}
Catch {
      Write-Host $error[0] -ForegroundColor "Red"
      exit 10
}
Source the YAML Pipeline
Source the following Azure DevOps YAML pipeline. You can source this YAML pipeline from my GitHub repository as well.
This pipeline runs on a schedule, every Saturday at midnight.
trigger: none
pr: none
schedules:
- cron: "0 0 * * 6"
  displayName: Weekly NSG capture
  branches:
    include:
      - master
  always: true

pool:
  vmImage: 'vs2017-win2016'

steps:
- task: AzurePowerShell@5
  displayName: 'Capture NSGs'
  inputs:
    azureSubscription: 'captureNsg'
    ScriptType: 'FilePath'
    ScriptPath: '$(System.DefaultWorkingDirectory)/Get-AzNetworkSecurityGroupSecurityRules.ps1'
    ScriptArguments: '-Subscription "subscription01"'
    azurePowerShellVersion: 'LatestVersion'

- task: AzureFileCopy@3
  displayName: 'Copy NSGs to Storage Account'
  inputs:
    SourcePath: '$(System.DefaultWorkingDirectory)/nsgRules/subscription01'
    azureSubscription: 'captureNsg'
    Destination: 'AzureBlob'
    storage: 'storageAccount01'
    ContainerName: 'nsgs'
    BlobPrefix: 'subscription01/build-$(Build.BuildNumber)'
Successful Job Output
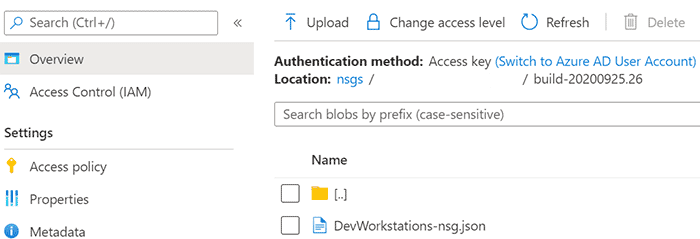
Once you’ve got the pipeline set up correctly you will get a result similar to the screen captures below.
Azure DevOps Pipeline

Storage Account Container
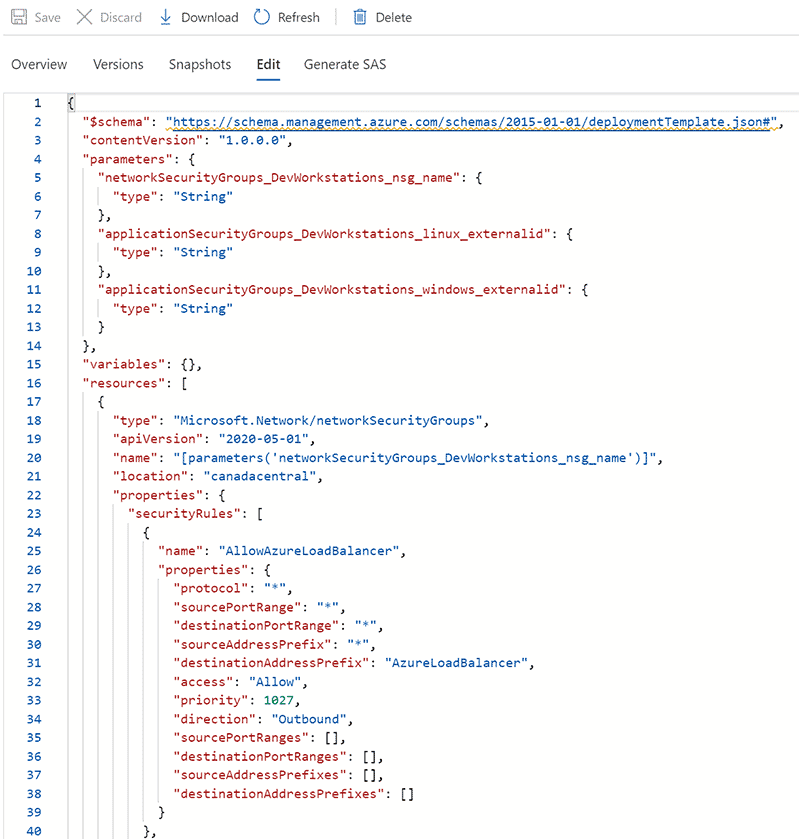
Exported NSG Example